Account and security
Set up single sign-on (SAML) for your team
Let your team sign in through your identity provider, such as Okta, Microsoft Entra ID or Google Workspace, and require it for members.
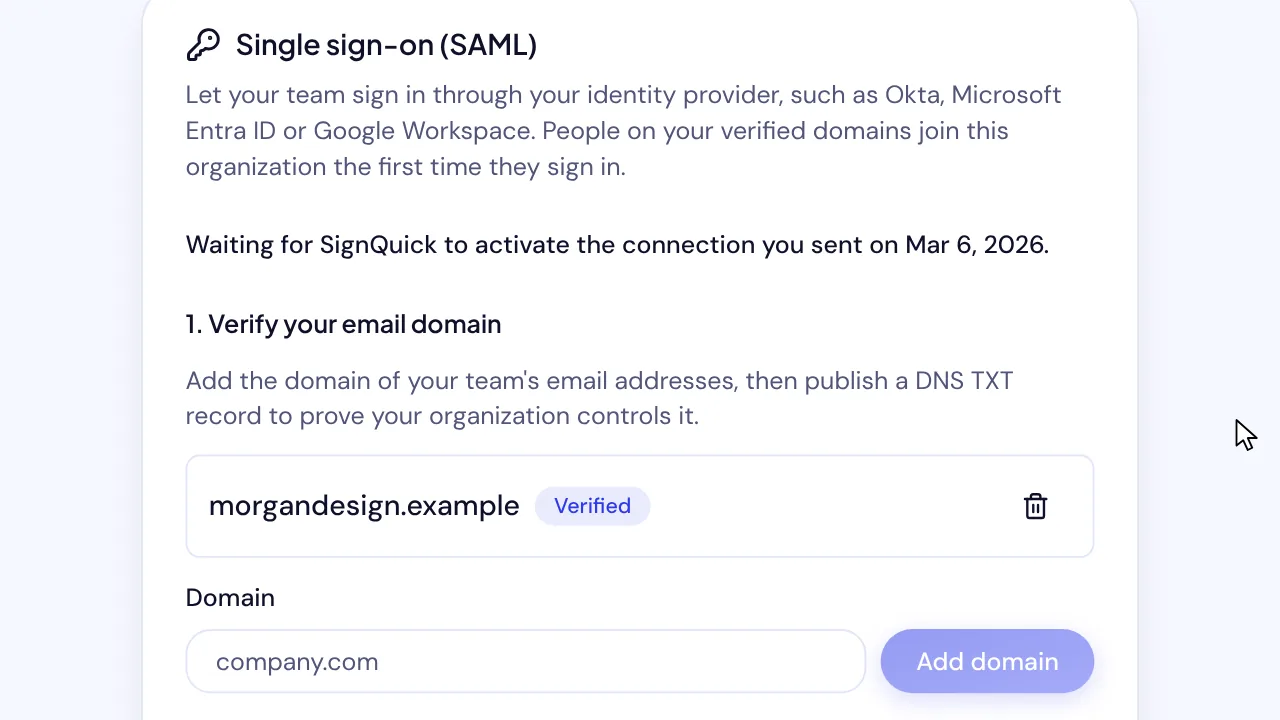
In SignQuick, the organization owner verifies the email domain, sends the identity provider's metadata, and can then require single sign-on for members.
Who can use this feature?
- Plans
- Any plan can set it up. Each person who joins through single sign-on takes a seat, and only the Team plan has seats for members.
- Who can do it
- Only the organization owner changes single sign-on. Other members see its status.
Connect your identity provider
Single sign-on lets your team sign in through your identity provider, such as Okta, Microsoft Entra ID or Google Workspace. People with an email address on a verified domain join your organization the first time they sign in this way.
- Step 1: In the sidebar, select Settings, the gear icon next to your name.
- Step 2: Select Organization.
- Step 3: Under Single sign-on (SAML), enter your team's email domain in Domain and select Add domain.
- Step 4: At your DNS provider, add a TXT record with the Record name and Record value the card shows, then select Check DNS record.
- Step 5: In your identity provider, create a SAML 2.0 application with the Entity ID (audience) and the Assertion consumer service URL (reply URL) from the card. Send the person's work email address as the NameID or as an attribute named email.
- Step 6: Under 3. Send your identity provider's metadata, enter the Metadata URL, or choose Paste the metadata XML and paste it.
- Step 7: Select Send for activation.
Result: The domain shows Verified, and the card shows Waiting for SignQuick to activate the connection until SignQuick turns it on. Then it shows Single sign-on is active.
Require single sign-on for members
Once the connection is active, you can make members sign in only through single sign-on. Members who signed in with a password, a magic link or Google are signed out and sign in again with Continue with SSO.
Signing in through single sign-on uses a separate SignQuick account, which joins your organization and takes a seat. Documents stay with the organization. Remove members' old accounts in Team settings to free their seats.
- Step 1: Under 4. Require single sign-on, turn on Members must sign in through single sign-on.
- Step 2: Select Require single sign-on to confirm.
Result: SignQuick shows Single sign-on is now required for members.
Sign in with single sign-on
- Step 1: On the SignQuick sign-in page, select Continue with SSO.
- Step 2: Enter your Work email and select Continue with SSO.
- Step 3: Sign in at your organization's identity provider.
Result: SignQuick signs you in. The first time, your account joins your organization.
Common questions
Can I change the identity provider later?
Until SignQuick activates the connection, send different metadata under step 3. Once it's active, contact SignQuick support to change it.
Why can't a teammate join through single sign-on?
If the organization has no free seats, they can't join until the owner frees a seat or upgrades. An account that already has its own documents can't join automatically, so the owner invites it instead.
What happens if I remove a verified domain?
People on that domain can no longer join or sign in through single sign-on, and their single sign-on sessions end.