Sending documents
Attach signed PDFs and add BCC copies
Attach the signed PDF to completion emails, privately copy completed documents to your records address, and set a template's own expiry.
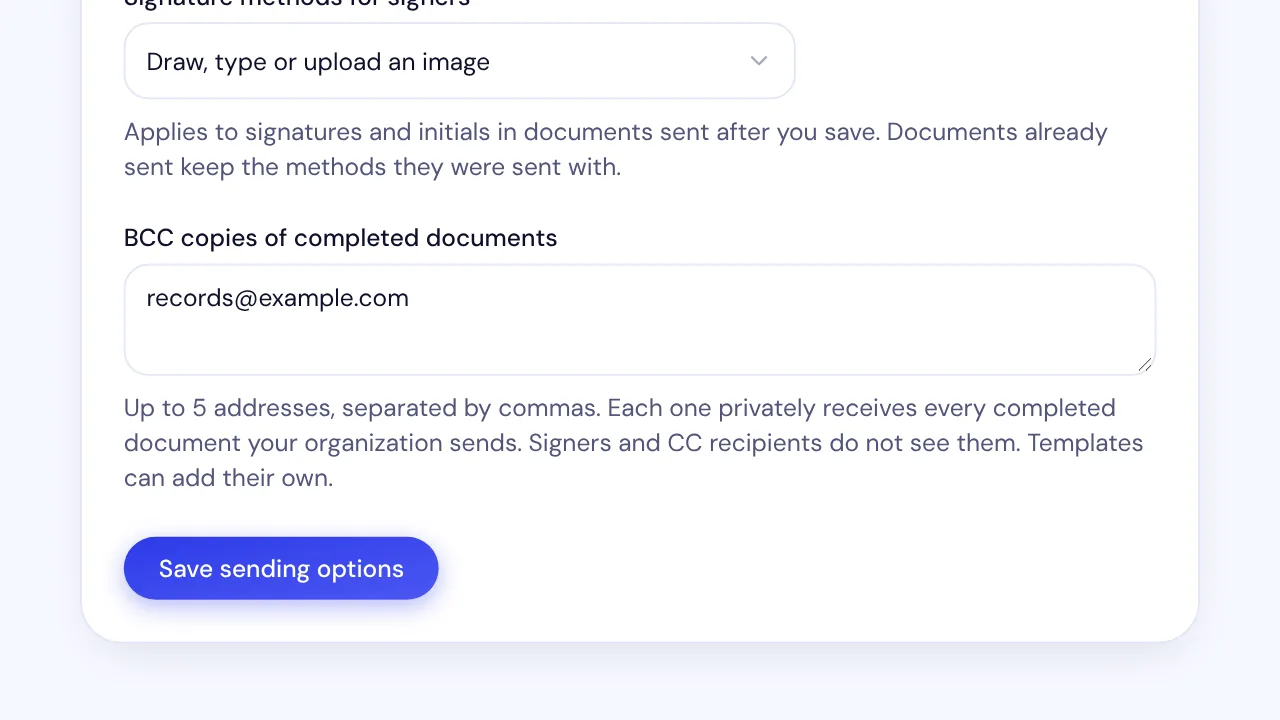
In SignQuick, Owners and Admins choose completion email attachments and BCC copies in Settings, Organization, Sending and signing options.
Who can use this feature?
- Who can do it
- Owners and Admins set the organization's attachments and BCC copies, and a template's BCC copies. Anyone who can manage a template can set its expiry.
Attach files and add BCC copies for every document
When a document is completed, signers, CC recipients, BCC addresses and the sender get an email with a private download link. You can also attach the files, and copy every completed document to up to 5 addresses that nobody else sees.
- Step 1: In the sidebar, select Settings, the gear icon next to your name.
- Step 2: Select Organization.
- Step 3: In Sending and signing options, open Attachments on completion emails and choose Attach the signed PDF or Attach the signed PDF and the audit trail.
- Step 4: In BCC copies of completed documents, enter up to 5 email addresses, separated by commas.
- Step 5: Select Save sending options.
Result: SignQuick shows Sending options saved. Documents completed from then on follow these choices.
Common questions
Why did a signer get only the link?
Signers protected by an access code or email verification always get the link only, so the file never skips those checks. The private download link is in every completion email.
Who sees the BCC addresses?
Nobody else. Signers and CC recipients don't see them, and they aren't listed in the audit-trail PDF. Each address gets its own private download link.
Set a template's expiry and BCC copies
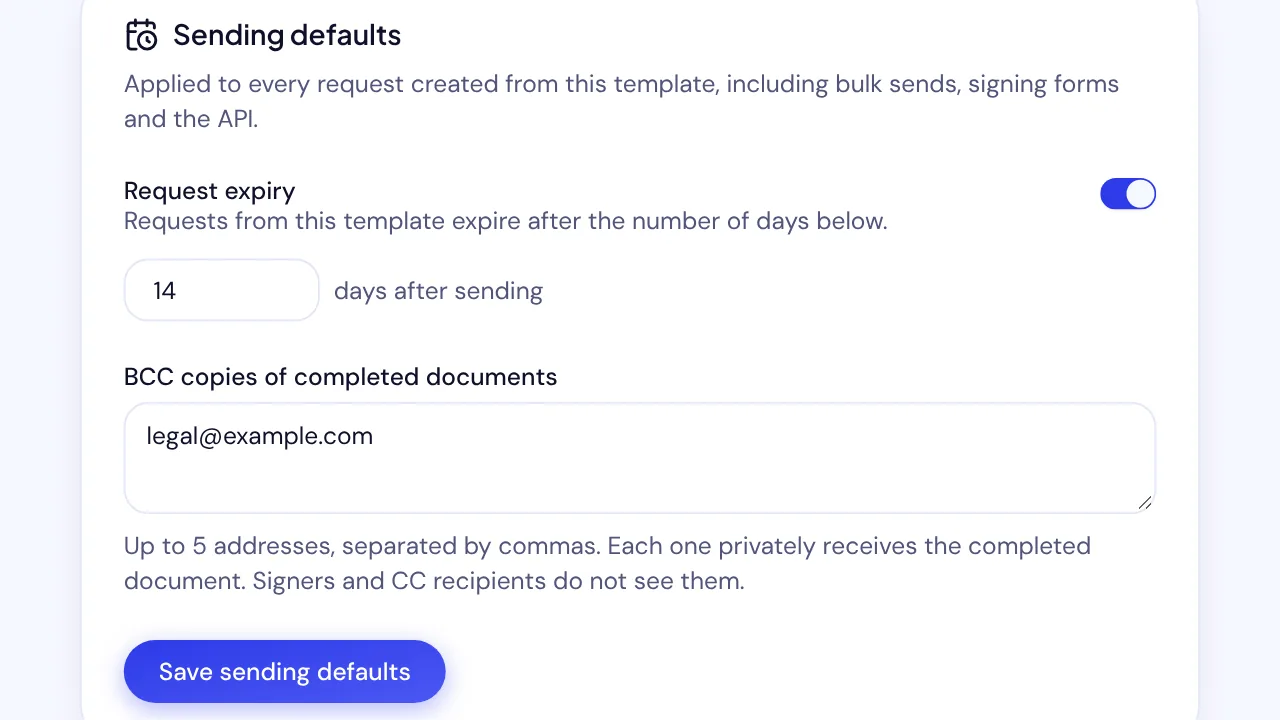
A template's sending defaults apply to every request created from it, including bulk sends, signing forms and the API. Its BCC addresses are added to the organization's.
- Step 1: In the sidebar, select Templates.
- Step 2: Open the template.
- Step 3: In Sending defaults, turn on the Request expiry switch and enter the number of days, from 1 to 365.
- Step 4: In BCC copies of completed documents, enter up to 5 email addresses, separated by commas.
- Step 5: Select Save sending defaults.
Result: SignQuick shows Sending defaults saved. Requests created from the template from then on expire after that many days and copy the BCC addresses.