Signing documents
Check a signed PDF's digital signature
Check that a completed SignQuick PDF still carries an intact digital seal, and see who sealed it and when.
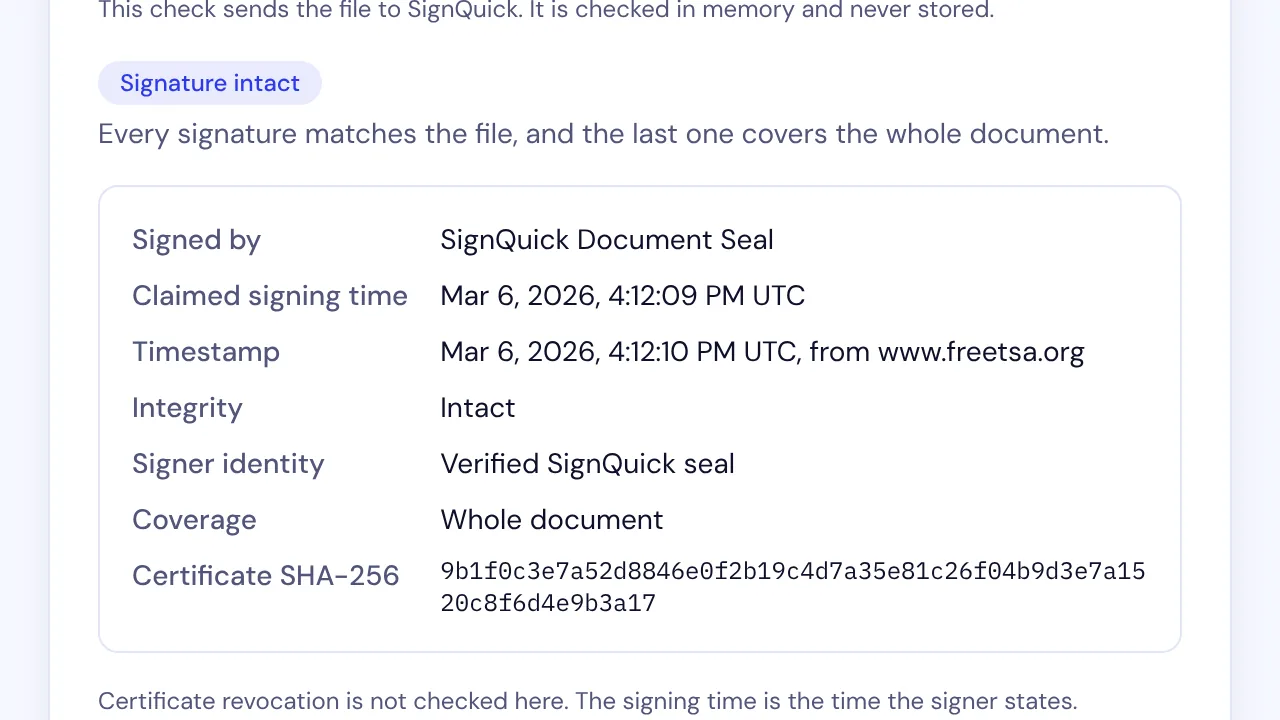
To check a SignQuick PDF's digital signature, open the public verifier, choose the PDF under Check the digital signature and select Check signature.
Who can use this feature?
- Before you start
- A PDF of 10 MB or less. You don't need a SignQuick account.
Check the digital signature
Completed SignQuick PDFs carry a PDF digital signature (PAdES), the SignQuick seal, with a timestamp from a timestamp authority. The check shows whether the file changed after it was sealed. It works for any PDF, not only one from SignQuick.
- Step 1: Open the public verifier at signquick.org/verify, or open a document's verification page from its verification link.
- Step 2: Under Check the digital signature, choose the PDF.
- Step 3: Select Check signature.
Result: If the seal is intact, the page shows Signature intact, who sealed the file, its timestamp and Whole document. Otherwise it shows A signature is broken, Changed after signing or No digital signature.
Common questions
Is my file stored?
No. The check sends the file to SignQuick, checks it in memory and never stores it.
Why does it say No digital signature?
Documents completed before SignQuick added the seal have no digital signature. Check them against their hash record with the local file hash check instead.
What each result means
Signature intact: every signature matches the file, and the last one covers the whole document.
A signature is broken: at least one signature no longer matches the file, or it could not be checked. Ask the sender for the original completed PDF.
Changed after signing: the signatures match, but content was added to the file after the last one. Coverage shows how many bytes were added.
No digital signature: the PDF has no digital signature.
Signer identity shows Verified SignQuick seal when SignQuick's certificate sealed the file. A timestamp time is set by the timestamp authority, not by the signer, and shows the signature existed by then. Certificate revocation isn't checked.
Common questions
Why does Signer identity say Not verified by SignQuick?
The file was sealed with a certificate that isn't SignQuick's, such as an organization's own seal certificate. Integrity still shows whether the file changed. Your PDF reader trusts that certificate only if it trusts the authority that issued it.
See the seal as trusted in Adobe Acrobat
Acrobat shows the SignQuick seal as trusted after you import SignQuick's seal root certificate. The certificate holds public keys only.
- Step 1: On the public verifier, select Download the SignQuick seal root certificate.
- Step 2: In Adobe Acrobat, open Preferences, then Signatures, and next to Identities & Trusted Certificates select More.
- Step 3: Select Trusted Certificates, then Import, and import the file you downloaded.
- Step 4: Select the SignQuick certificate, select Edit Trust, turn on Use this certificate as a trusted root, and select OK.
Result: When you open a sealed SignQuick PDF in Acrobat, its signature panel shows the seal as valid.